
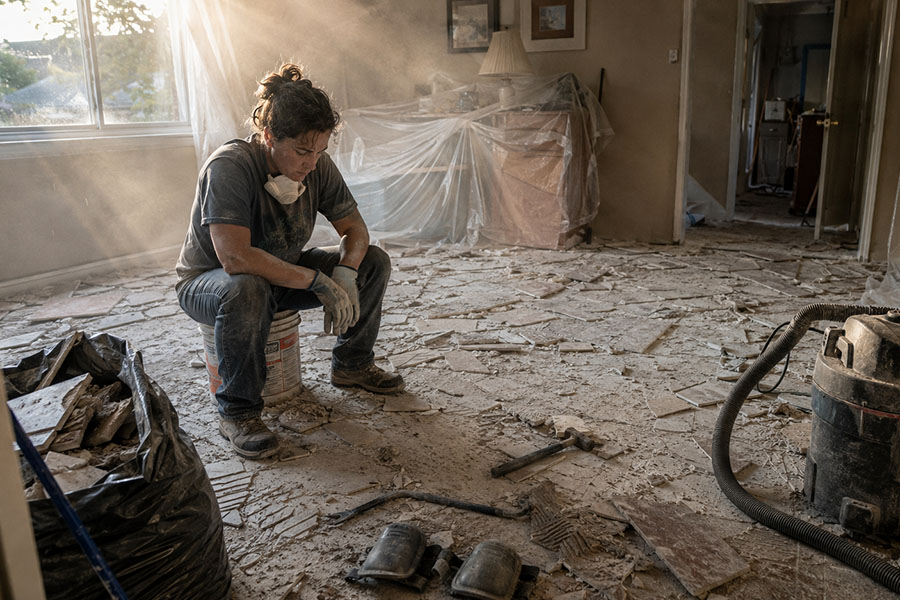
Most people start removing floors themselves to save money. Then the dust, the damaged subfloor, and the extra days pile up. Here’s what actually happens and what it really costs.
You start with a simple plan.
Rip out the old floor this weekend. Save a few thousand dollars. Get the new flooring down faster.
By Sunday night, the living room looks like a disaster site, the dust has migrated into rooms you sealed off, your back is done, and you’re staring at a subfloor that now needs more work than the original floor did.
That pattern repeats more often than the internet admits.
Here’s what actually happens when people remove floors themselves, and why the “savings” so often disappear.
You think the hard part is just getting the floor up
It isn’t.
The floor coming up is only the first layer of the problem. What sits underneath — thinset, glue, staples, padding, residual adhesive — is where the real time and money go. Glue-down hardwood and vinyl can take two or three times longer than people expect once you start scraping. Tile with a heavy thinset bed is worse. You break the surface, then you spend hours (or days) trying to get the slab clean enough that the next flooring will actually sit flat.
A lot of DIYers stop when the visible flooring is gone and call it done. Then the installer shows up, runs a straightedge across the floor, and tells you it needs grinding or leveling before they can start. That extra prep work is almost never in the original DIY budget.
The dust problem is bigger than it looks
Floor removal creates a surprising amount of fine dust. Tile and thinset release respirable crystalline silica. Even carpet and pad send fibers and old dirt into the air.
Most people hang plastic and run a regular shop vac. That helps a little. It does not stop the fine particles from traveling through the house, settling in HVAC systems, and showing up in rooms you thought were protected for days afterward. Cleanup that was supposed to take an afternoon stretches into a week of wiping surfaces, changing filters, and still finding grit in unexpected places.
Professional crews using proper dust-collection equipment keep most of that contained at the source. The difference in the rest of the house is obvious once you’ve lived through both versions.
Subfloor damage is the quiet budget killer
This is the mistake that turns a “saved” project into an expensive one.
Aggressive prying, the wrong angle on a chisel, or a rental tool that digs too deep leaves gouges, uneven spots, or delaminated plywood. Concrete can take shallow damage that still shows through new LVP or thin flooring. Wood subfloors are less forgiving.
Once the damage is there, you pay twice: once in the time you already spent, and again when someone has to patch, level, or, in bad cases, replace sections of the subfloor before the new floor can go down. That second bill is the one that makes people say they should have hired it out from the start.
Disposal is never free
You can pull the floor up. Getting rid of it is a separate problem.
Tile and thinset are heavy. A full room can fill a dumpster faster than expected. Dumpster rental, landfill fees, and the labor of loading everything add up. Some people make multiple trips to the dump in a personal truck and still end up paying more in time and fuel than they planned. Carpet is bulky out of proportion to its weight. Glue-down materials leave sticky residue that makes everything harder to handle.
Professional quotes usually include haul-away. DIY numbers often leave it out until the pile is sitting in the driveway.
Time is the cost nobody puts on the spreadsheet
A motivated person can pull carpet from a bedroom in a few hours. Tile or glued hardwood across a larger area is a different story. What was supposed to be a weekend project becomes three or four weekends. Furniture stays stacked in other rooms. The house stays disrupted. The new flooring order sits in the garage waiting.
Meanwhile, the rest of the remodel timeline slips. That delay has a cost even if you never write it down.
The “I’ll just do the removal and hire the install” compromise
This is the middle option a lot of people land on, and it can work — with conditions.
If you do the tear-out yourself, the installer will still judge the subfloor condition. Some will not warranty their work over a surface they didn’t expose and prepare. You need clear agreement in advance about what “ready” looks like. If the surface needs significant extra grinding or patching, the savings shrink fast.
Also worth knowing: older homes (especially pre-1980s) can have asbestos in certain vinyl tiles or adhesives. Disturbing that material without testing is a serious problem.
Testing is inexpensive. Skipping it is not.
What the numbers actually look like
Professional floor removal in 2026 typically runs in these ranges (labor and basic disposal, varying by material and region):
- Carpet: often the lowest cost per square foot
- Vinyl / LVP: mid-range, higher if glued
- Hardwood: higher, especially glue-down
- Tile with thinset: usually the highest
DIY looks cheaper on paper until you add tool rental or purchase, dumpster or dump runs, extra days of labor, possible subfloor repair, and the extended disruption to the rest of the house. Many homeowners who finish the job still say the total cost (money plus time plus stress) landed higher than a professional quote would have been.
The outcome that matters most
The goal is not just to get the old floor out of the house.
The goal is a subfloor that is clean, flat, and ready for the next installation so the rest of the project can move forward without delays or change orders.
A surface that is properly prepared for the next installation is what many DIY jobs miss. That preparation helps the larger remodel stay on schedule.
If you are already seeing dust, damage, or a stretching timeline—or you want real numbers before starting—compare the scope with our professional floor removal services and request a professional quote. Sometimes the math favors doing part of it yourself; often it does not.
Either way, knowing the full picture before the next swing of the pry bar is the cheapest mistake to avoid.